2024 Cooperative Lakes Monitoring Program Enrollment Guide

Enrollment for the MiCorps Cooperative Lakes Monitoring Program (CLMP) is entirely online. Once you’ve created your CLMP account, it is easy to come back to the site and update your information, add/remove lakes from your profile, enroll your lake in parameters for the year, and make payments.

Returning 2023 Volunteer:

If you are a returning volunteer from 2023, you will need to sign the 2024 waiver, enroll your lake in parameters for the year, and pay.

New Volunteer:

All new volunteers need to sign up for a new CLMP account. Your account will include your contact information and the names of lake(s) that you monitor.

When signing up for your new CLMP account, you will be asked if you are a “Lead Volunteer” or an “Assisting Volunteer”. This is an important distinction!

  • Select "Lead Volunteer" if you are the person who selects the monitoring parameters each year and arranges for payment, either by making the payment yourself or directing an invoice to a lake association or other organization. All monitoring equipment and supplies will be sent to you.

  • Select "Assisting Volunteer" if you help with monitoring, but you do not manage enrollment or payment. Monitoring equipment and supplies will not be sent directly to you; it will be sent to the Lead Volunteer for your lake.

If you are not sure whether to choose Lead Volunteer or Assisting Volunteer, please contact us at MiCorps@msu.edu.

For Returning Volunteers

Sign in to your account using your 2023 username and password.

  1. Go to: https://data.micorps.net/clmp/ Sign into your account button
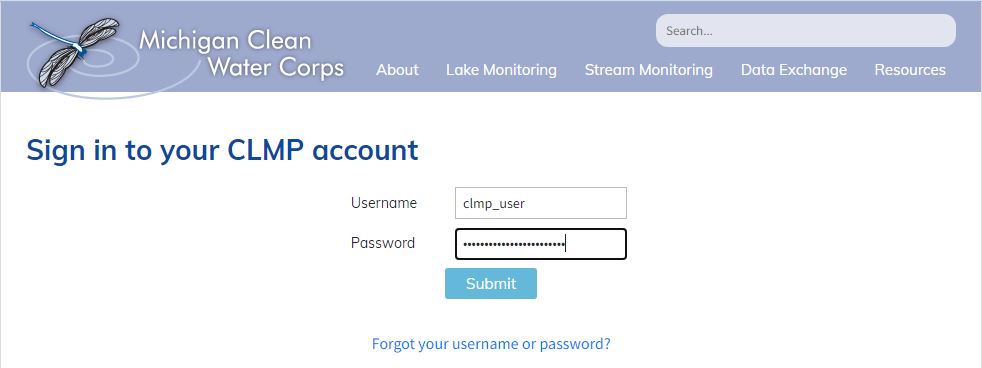
  2. Enter your Username and Password from your 2023 enrollment. CLMP login screen
  3. Click View / Sign Waiver and then sign the waiver. After signing, click the green Submit Waiver. You will then need to sign in with your username and password. You will now be able to enroll your lake(s)
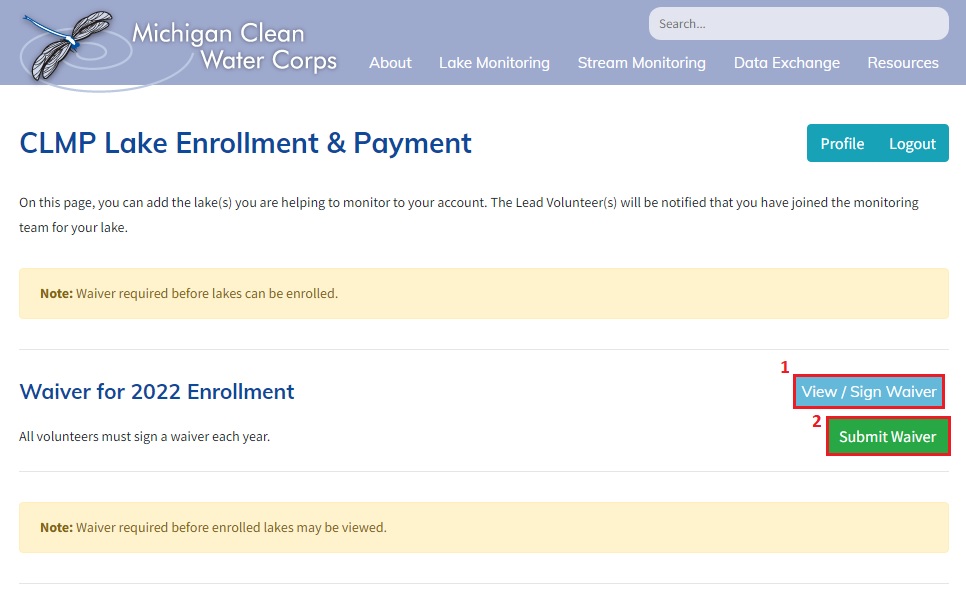
    Sign Waiver Buttons

For New Volunteers

Step 1: Sign up for a new CLMP Account.

  1. Go to: https://data.micorps.net/clmp/
    • Click the button
  2. Create a username and password and enter the requested personal information.
    • Note that the requested demographic information is voluntary, but very helpful. Where responses are required, you will have the option to select "Choose not to provide".
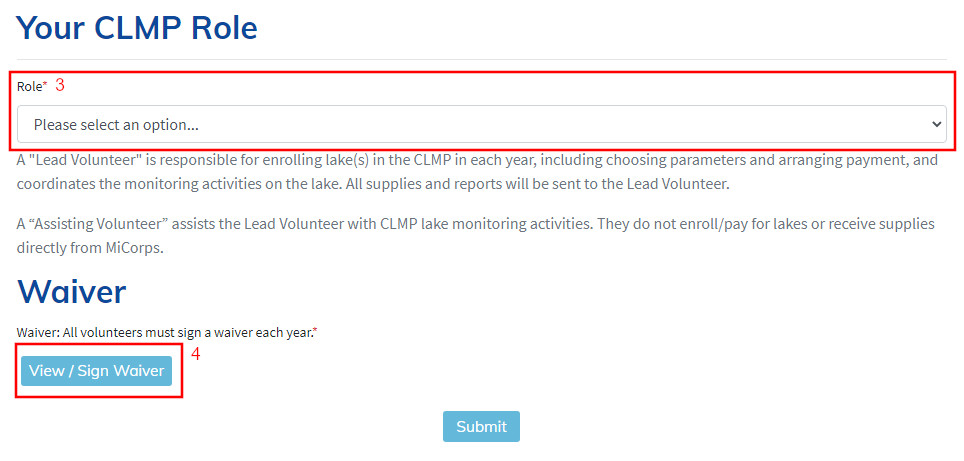
  3. Choose your CLMP Role
    • Click "Please select an option…" and choose either "Lead Volunteer" or "Assisting Volunteer" from the dropdown menu. Refer to page 1 for descriptions of these roles.
  4. Sign the liability waiver
    • Click the button
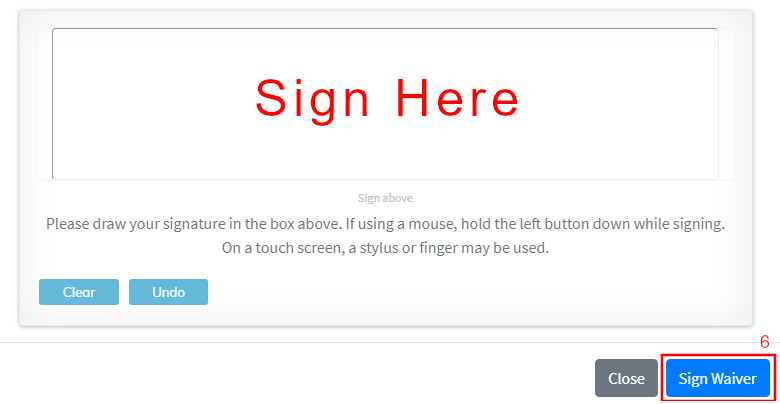
  5. Read the waiver carefully and sign your name in the signature box. To sign, move your mouse cursor over the signature box and hold the left mouse button down while signing. If you have a touch screen, you can use a stylus or finger.
  6. Click the button when you are done signing.
  7. Review your information and click when you are done.

Step 2: Choose the lake(s) that you will be monitoring

  1. Enter your new CLMP account username and password and click
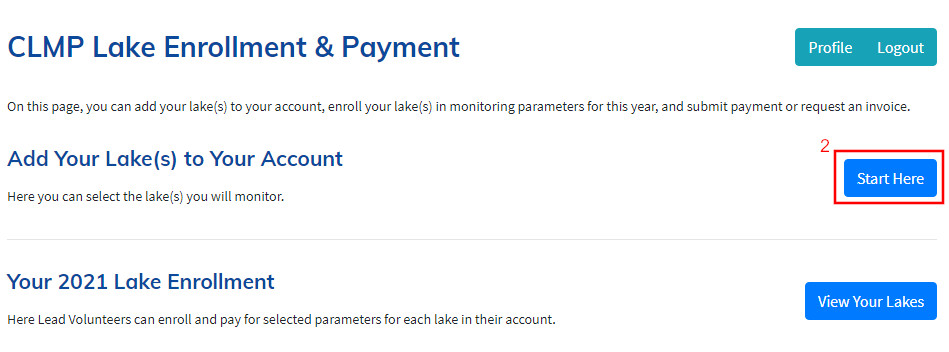
  2. On the "CLMP Lake Enrollment & Payment" page, click to the right of "Add Your Lake(s) to Your Account". The next page may take a minute to load.
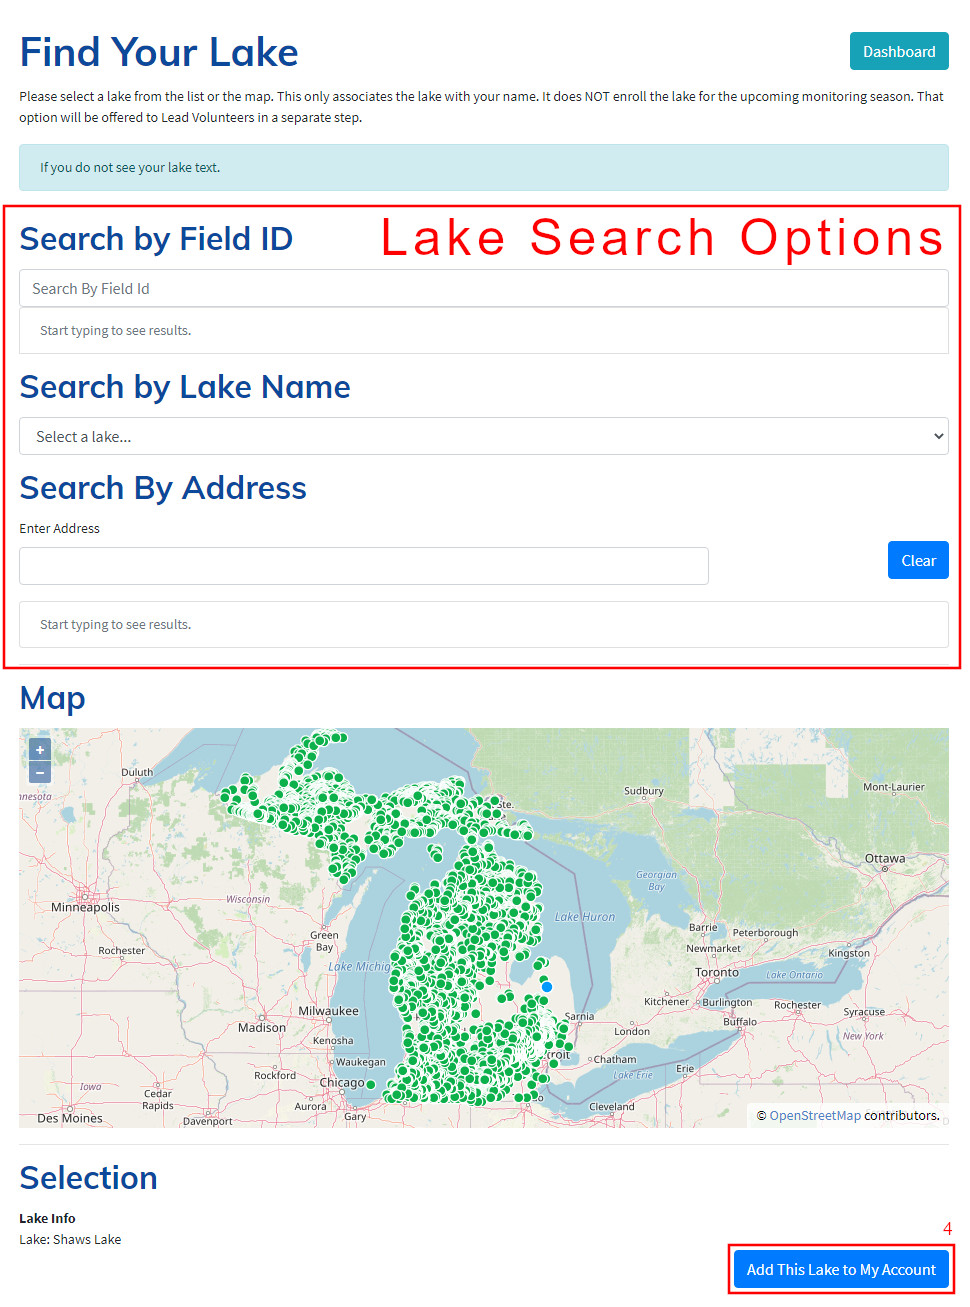
  3. On the page, "Find Your Lake", you have multiple options to select your lake – you can search by Field ID, Lake Name and County, Address, or by searching on the map. This associates a lake with your account.
    • NOTE: You will only be able to add your lake to your account once the Lead Volunteer has enrolled it for the upcoming monitoring season.
  4. Once you select a lake, click the button
    • This is the last step for Assisting Volunteers and you may now logout.
    • If you are a Lead Volunteer, you will automatically be taken to the Parameter Selection page.

Step 3: Select Your Parameters (For Lead Volunteers)

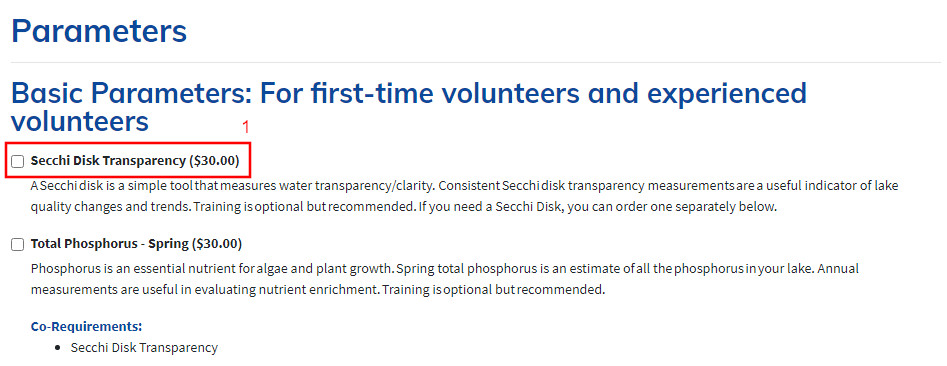
  1. As a Lead Volunteer, you will automatically be taken to the "Parameter Page". Click the open box next to the parameters that you wish to enroll. Read the descriptions carefully to choose the parameters you want.
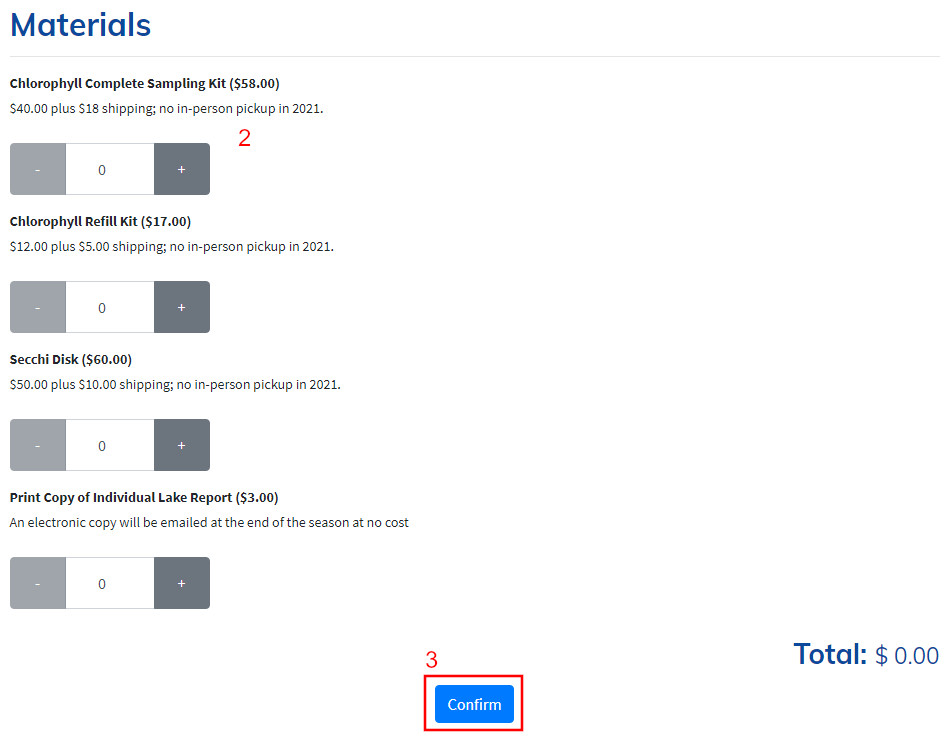
  2. If you need chlorophyll kits, a Secchi disk, or printed lake reports, select the desired quantities under the “Materials” section.
  3. When you are satisfied with your selections, click the button on the bottom of the page.
  4. Review your order
    1. If you plan to pay the enrollment fees yourself, click the button on the bottom of the page.
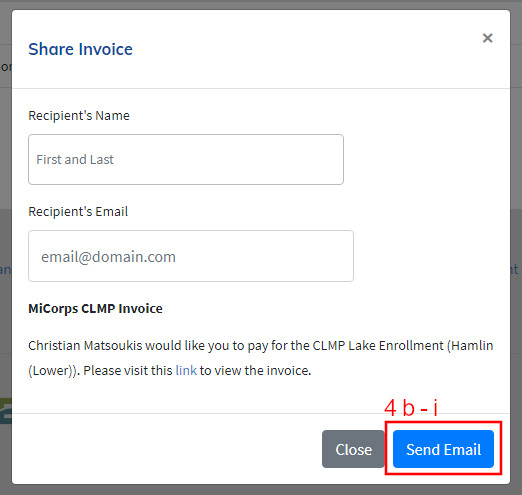
    2. Or, if you wish to send an invoice to someone else, such as your lake association, to pay the enrollment fees, click button.
      1. In the pop-up box, enter the name and email address of the person to whom you want to send the invoice. When complete, click the button.

Step 4: Pay

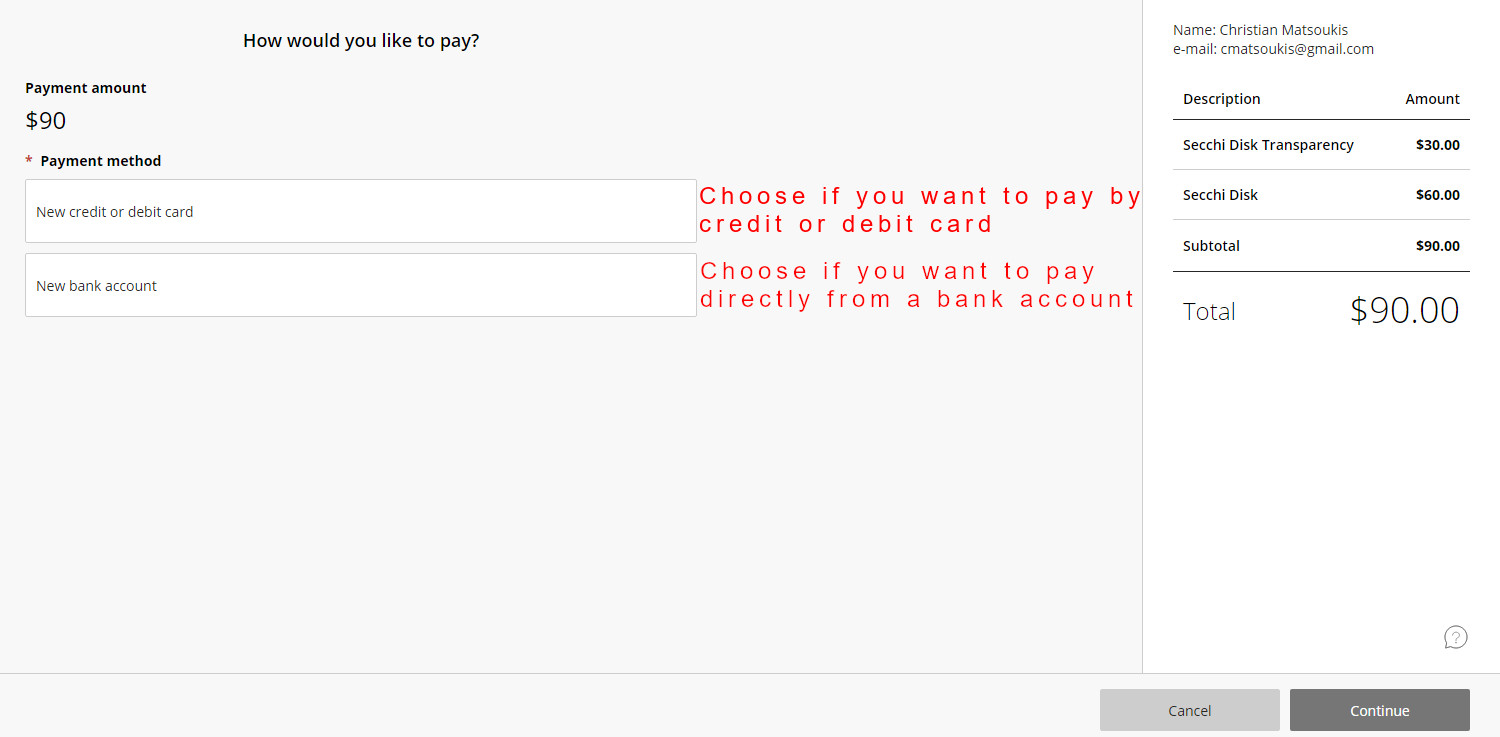
  1. Enter your name and email and click "Continue" on the bottom right of the page.
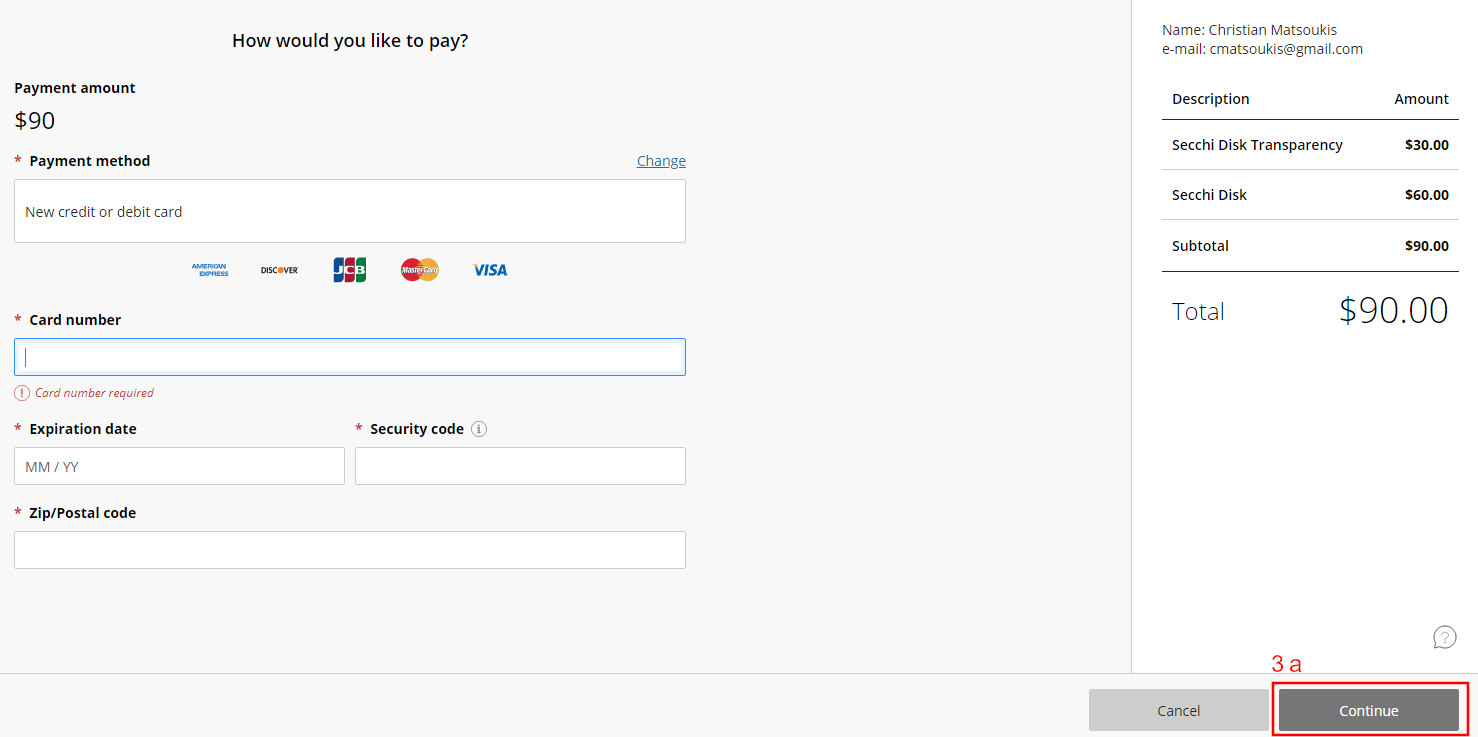
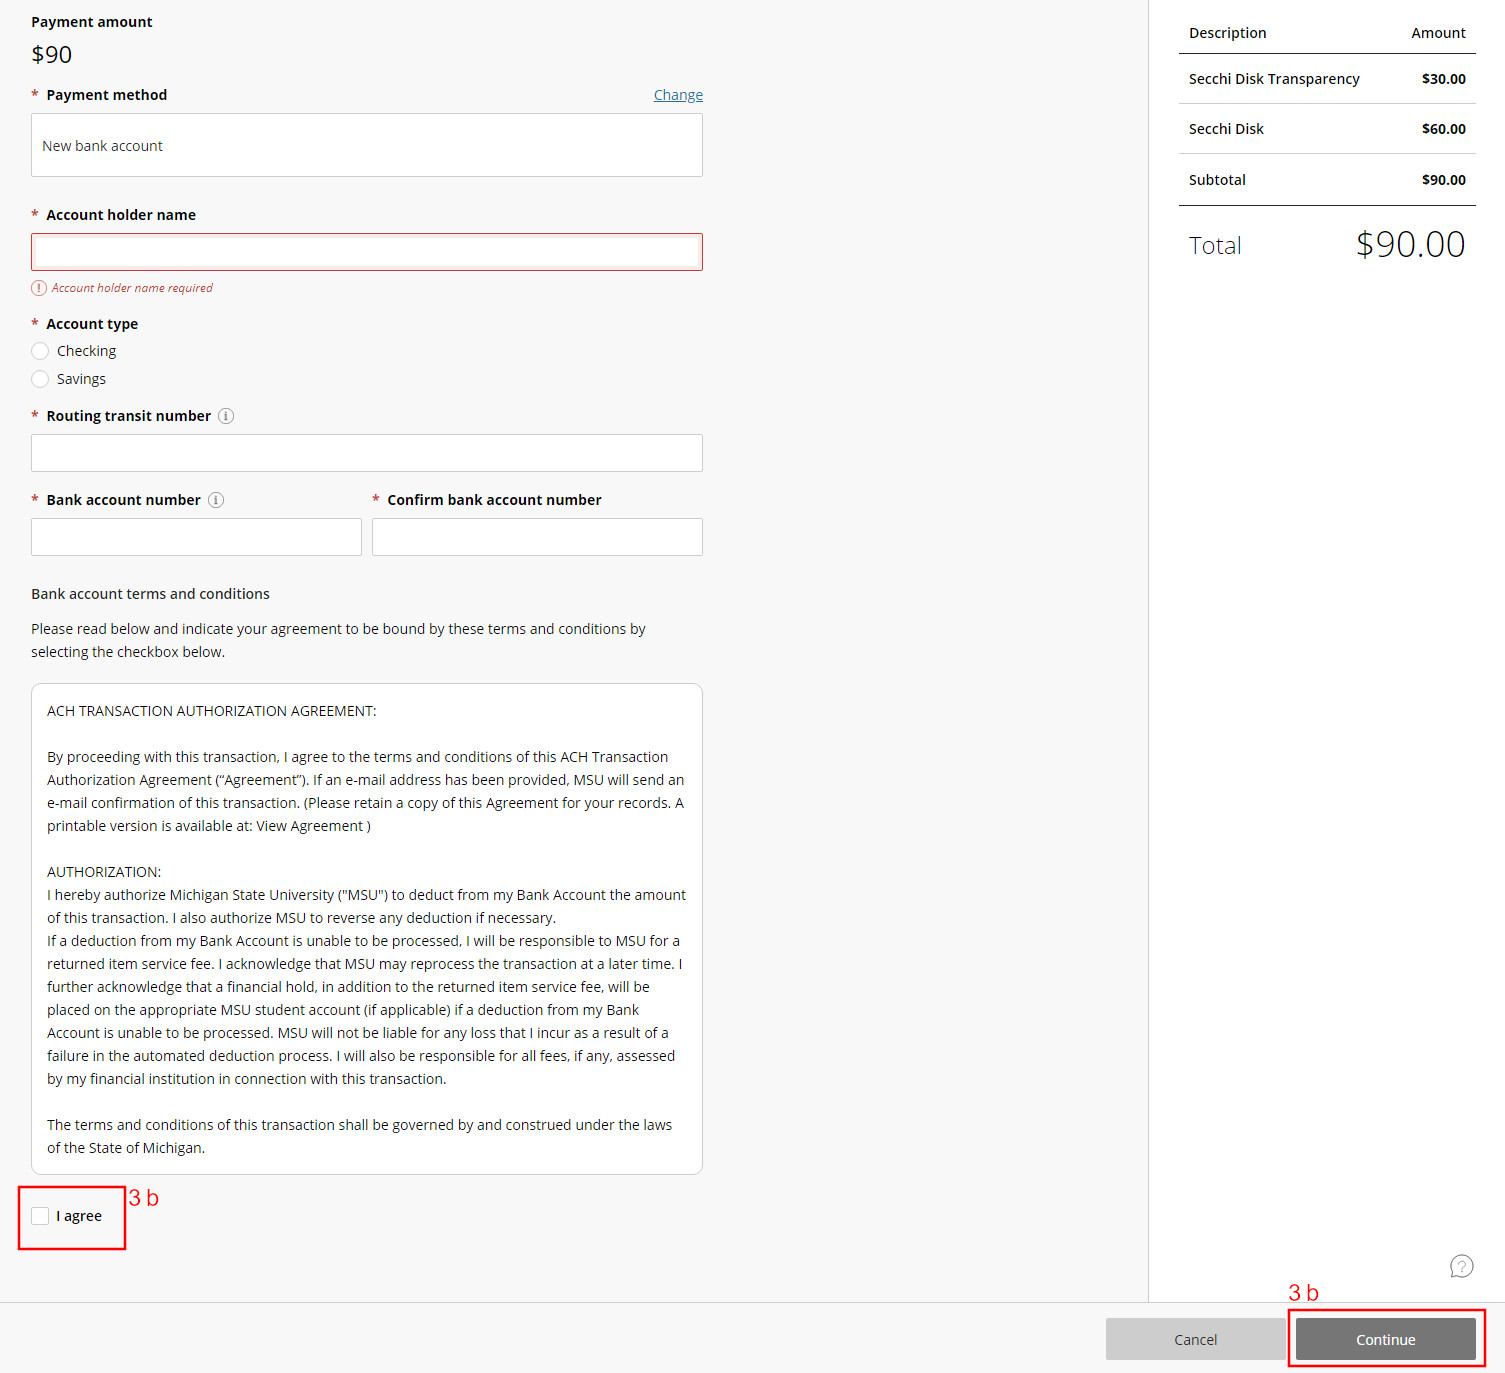
  2. Choose whether you want to pay by credit/ debit card or directly from a bank account (the electronic version of writing a check).
  3. Enter your payment information.
    1. If you chose to pay with a Credit/ Debit Card, enter your card information. When finished click, "Continue" on the bottom right corner of the page.
      1. Review your order information and if correct, click the "Pay" button on the bottom right corner of the page.
      2. A receipt will be emailed to you and you can now click, "Sign Out" on the bottom right corner of the page.
    2. If you chose to pay from a bank account, enter your account information and click "I Agree" at the bottom of the page.
        1. Review your order information and if correct, click the "Pay" button on the bottom right corner of the page.
        2. A receipt will be emailed to you and you can now click, "Sign Out" on the bottom right corner of the page.
  4. When finished click, "Continue" on the bottom right corner of the page

Congratulations! Your lake is now enrolled!

NOTE: If you want to enroll another lake, return to the "CLMP Lake Enrollment & Payment" page and click,